Table of Contents
Managing Users and Permissions
 Updated
by Jennifer Sneider
Updated
by Jennifer Sneider
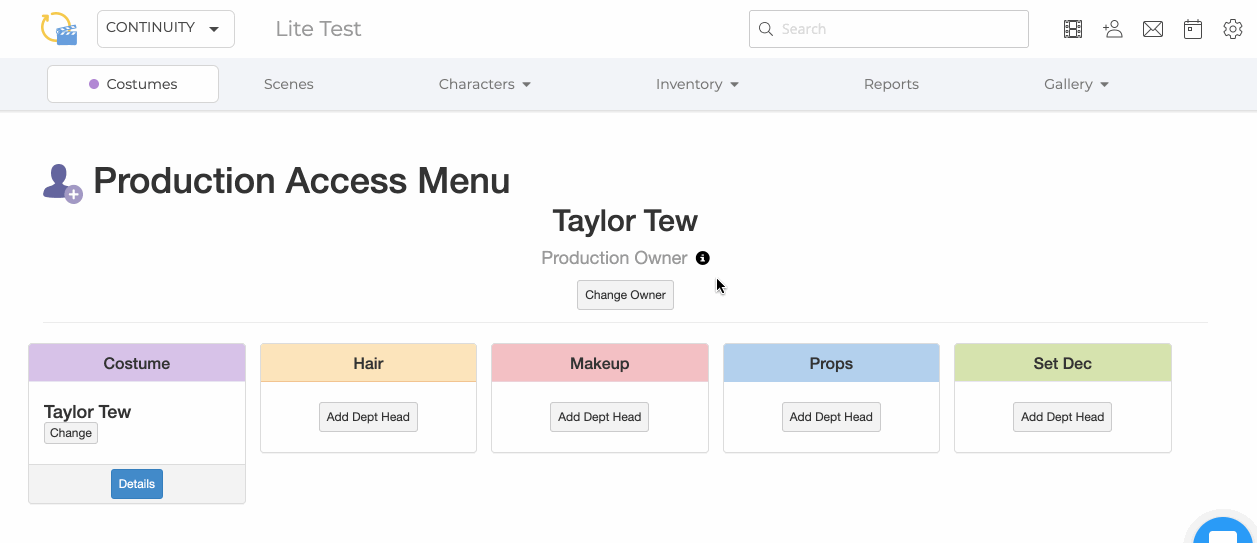
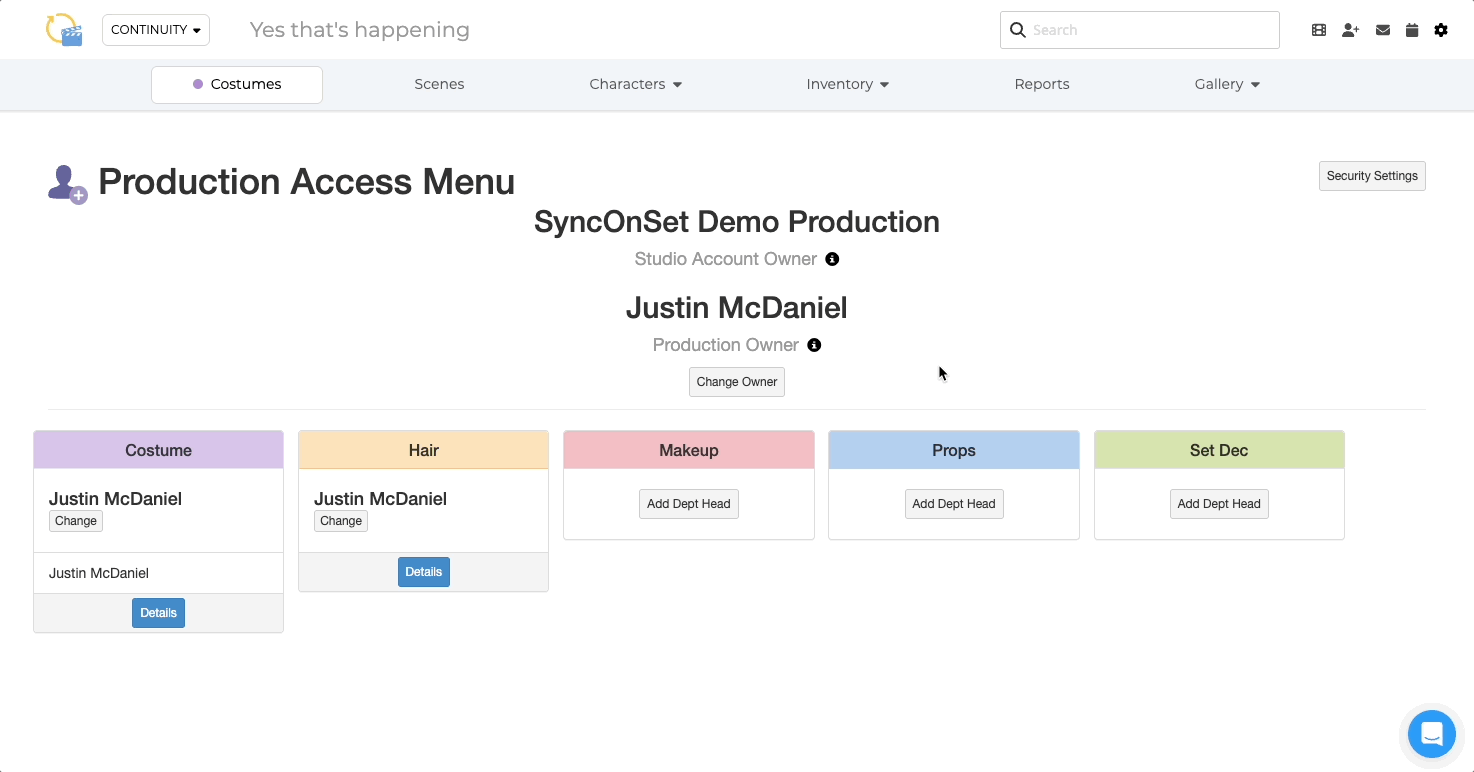
The ability to add or remove users or edit user permissions exists in the Access Menu. While logged in to your production, click the Access Menu/Add Users icon in the top right corner of the screen to access your Production Access Menu.
Assigning a Department Head
Only the Production Owner can assign a Department Head. You must add a Department Head before you can add users to that department.
To assign a Department Head:
- Log in to your production so the production title is visible at the top of the page.
- Click the Access Menu/Add Users icon in the top right corner of the screen.
- Click Add Dept Head under a specific department.
- Assign a new user by entering their email on the left, or select an existing user from the drop-down menu on the right.
- Click Save.
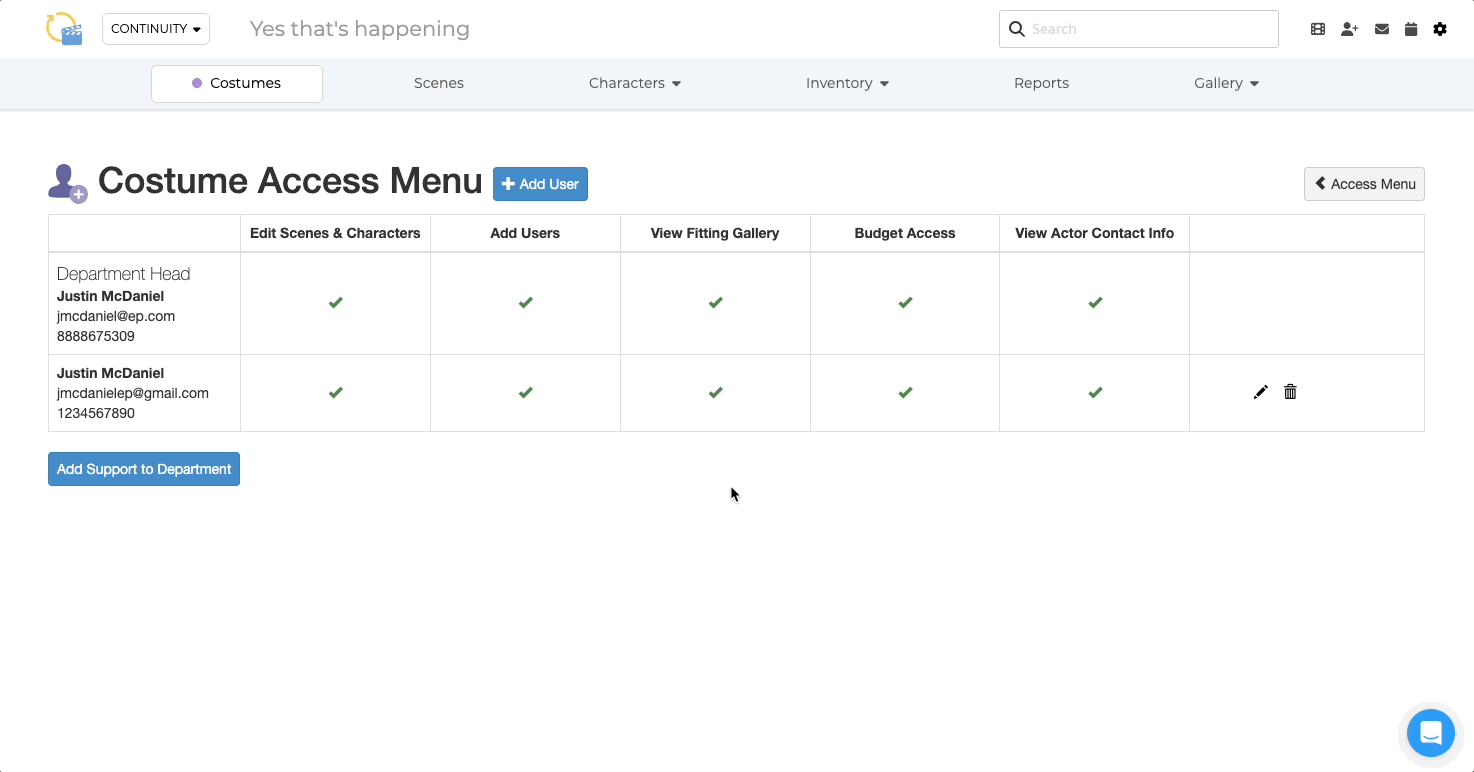
Adding Users to a Department
Only Production Owners, Department Heads and other users in the department with the Add User permission can add users to a department.
To add users to your department:
- Log in to your production so the production title is visible at the top of the page.
- Click the Access Menu/Add Users icon in the top right corner of the screen.
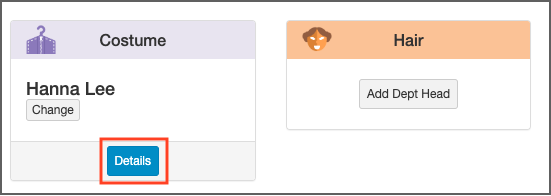
- Under your department, click Details.
- Click +Add User.
- Enter the email for a new user or select an existing user from the drop-down menu.
- Set the user's permissions and click Next or the Plus (+) Button to save and add another user.
- If working on a Traditional Episodic production, set the user's episode access, then click Save or the Plus (+) Button to save and add another user.
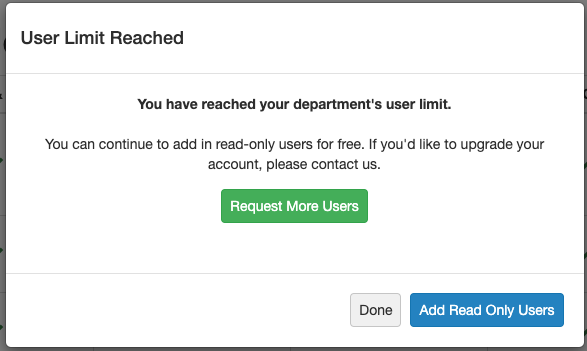
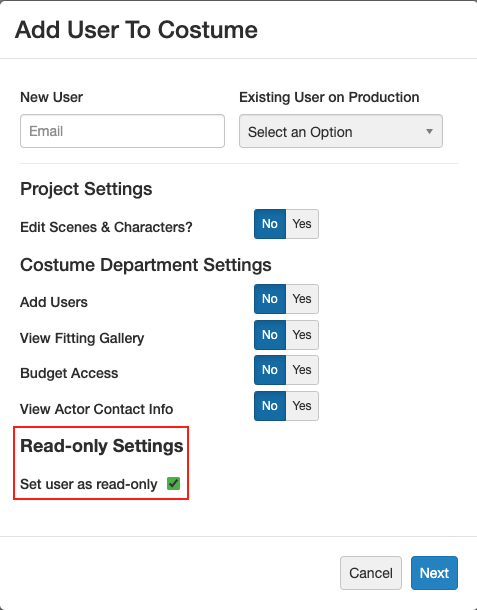
Adding a Read-Only User to a Department
Read-Only users can view a department's information but do not have the ability to add or edit anything. Users with permissions to multiple departments can use the Department Selector in the top navigation bar to view multiple departments at once.
- Log in to your production so the production title is visible at the top of the page.
- Click the Access Menu/Add Users icon in the top right corner of the screen.
- Under your department, click Details.
- Click +Add User.
- Enter the email for a new user or select an existing user from the drop-down menu.
- When adding a Read-Only user to your department, check the box in line with "Set user as read-only."
Deleting Users from a Production
Deleting Individual Users
- Log in to your production so the production title is visible at the top of the page.
- Click the Access Menu/Add Users icon in the top right corner of the screen.
- Under your department, click Details.
- Click the Trash Can icon in line with the person you want to delete.
- Click Remove in the form to confirm the deletion.
Deleting Users in Bulk
- Log in to your production so the production title is visible at the top of the page.
- Click the Access Menu/Add Users icon in the top right corner of the screen.
- Under your department, click Details.
- Click the Checkbox(es) to the left of the user(s) you'd like to delete.
- Click the Remove User button at the top of the page.
- Click Remove All to confirm.

Adjusting User Permissions
- While logged in to the production where you want to make adjustments, click the Access Menu/Add Users icon in the top right corner of the screen

- Under your department, click Details.
- Click the Pencil icon in line with the person whose permissions you want to adjust.
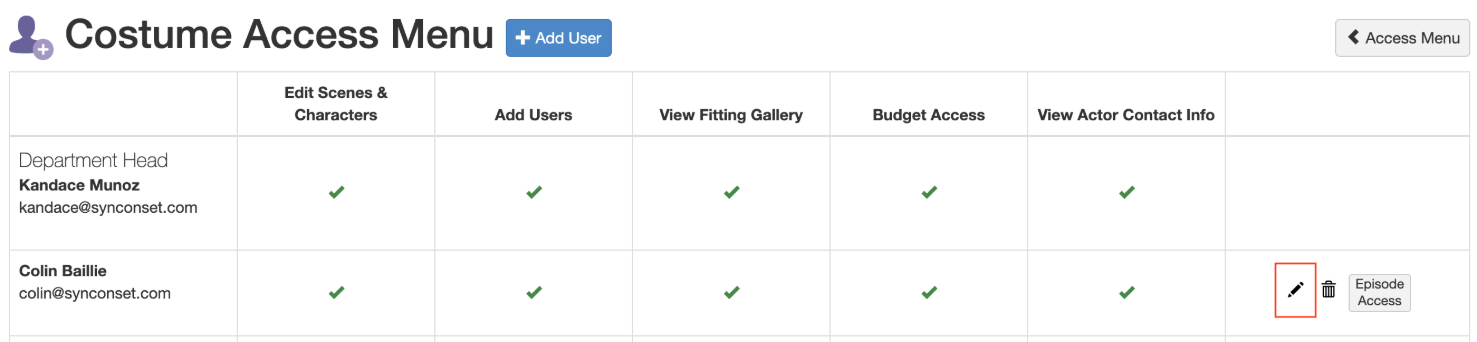
- Adjust permissions as desired and click Save.
Guide to User Permission Options
Project-Level Permissions
This permission affects all departments across the production.
- Edit Scenes & Characters? When set to Yes, the user can create and edit Scenes and Characters, as well as upload and revise scripts. When set to No, the user cannot make any changes to Scenes or Characters.
Department-Level Permissions
- Read Only? When the box is checked, the user can view a department's information but does not have the ability to add or edit anything. This setting is superseded by the Edit Scenes & Characters permission, so if a user is marked as Read-Only and has Edit Scenes & Characters marked yes, the user is still able to edit Scenes & Characters but unable to add notes or photos.
- Add Users allows/disallows the ability to invite other users into the production.
- View Fitting/Research Gallery allows/disallows access to photos marked as Research.
- Budget Access allows/disallows access to Budgeting.
- View Actor Contact Info allows/disallows access to Actor contact information.
- Web Access allows/disallows access to the web app. This option is only available if the Production Owner has enabled Security Settings to allow Mobile Only users.
Limiting a User’s Episode Access
To limit the episodes which a user can access:
- Log in to your production so the production title is visible at the top of the page.
- Click the Access Menu/Add Users icon in the top right corner of the screen.
- Under your department, click Details.
- Click the Episode Access button in line with the person whose episodes you want to limit.
- Check the boxes for episodes to which you want to grant access. Leave boxes blank for episodes you want to limit.
- Click Save.
Changing a Department Head
Only the current Department Head or Production Owner can change this position.
- Log in to your production so the production title is visible at the top of the page.
- Click the Access Menu/Add Users icon in the top right corner of the screen.
- Click Change under a specific department.
- Assign a new user by entering in their email on the left or select an existing user from the drop-down menu on the right.
- Click Save.
Changing the Production Owner
Only the current Production Owner can change this position. If the Production Owner leaves the production, you must transfer this role to a new user.
To change the Production Owner:
- Log in to your production so the production title is visible at the top of the page.
- Click the Access Menu/Add Users icon in the top right corner of the screen.
- Click Change Owner under Production Owner in the center of the screen.
- Assign a new user by entering their email on the left or select an existing user from the drop-down menu on the right.
- Click Save.
1. A signed letter on production letterhead from either the UPM or POC stating the name and email of the new PO and that we have permission to make the transfer.
2. A current call sheet or crew list that shows the UPM or POC's name and title for verification.