Continuity Web
Getting Started
Episodics
Adding Episodes
Viewing Multiple Episodes
Episodics: Traditional vs. Like a Feature
Season Data Transfer
Logging In With Your EP Account
Register for SyncOnSet
Creating a Production and Initial Script Breakdown
Revising a Script
Accessing My Productions
Production Homepage Overview
Production Security
Managing Users and Permissions
Working on a Shared Breakdown
Multi-Department Views
Free Trials
Lite Plan for Features
Student Productions
Universal Search
Adding Notes
Managing Approvals
Calendar View
SyncOnSet Best Practices for COVID Compliance
The New and Improved SyncOnSet
Multi-Factor Authentication (MFA)
Scenes
Scene Index Overview
Customizing the Scene Index
Managing Scenes
Managing Script Locations
Adding and Updating Shoot Dates
Scene View Overview
Adding Characters to a Scene
Inventory
Inventory Overview
Managing Inventory
Customizing the Inventory Index
Character Closets
Adding and Deleting Inventory
Inventory Reports
The New and Improved Inventory
Tracking Assets in Continuity
Characters and Sets
Character Index Overview
Character View Overview
Principal Characters with Multiple Numbers
Adding and Removing Background
Adding and Removing Principal Characters
Linking and Merging Characters
Deleting a Character
Set Index Overview
Set View Overview
Adding and Removing Sets
Changes and Looks
The New and Improved Changes and Looks
Changes Overview
Building a Change
Adding and Removing Changes
Editing and Inserting Changes
Bag Tags/Change Labels
Looks Overview
Building Looks for HMU
Adding and Removing Looks
Actors
Actor Index Overview
Creating Actors and Assigning Actors to Characters
Actor View Overview
The New and Improved Actors
Gallery
Gallery Overview
Uploading and Tagging Photos
Sorting and Filtering the Gallery
Printing & Sharing Photos
Wrap, Continuity Book, and Reports
Continuity Mobile
Getting Started
[Mobile] Logging In With Your EP Account
What's New in 5.5.0?
[Mobile] Home Page
[Mobile] App Settings
[Mobile] Multi-Department View
[Mobile] Syncing
[Mobile] Universal Search
[Mobile] Switching Productions and Multi-Episode View
[Mobile] Adding Notes
[Mobile] Permissions
The New and Improved Mobile App
Mobile App Overview
[Mobile] Upgrading to SyncOnSet 5.0
Scenes
Inventory
[Mobile] Inventory Overview
[Mobile] Character Closets
[Mobile] The New and Improved Inventory
[Mobile] Managing Inventory
[Mobile] Adding and Removing Inventory
Characters + Sets
[Mobile] Character Index Overview
[Mobile] Character View Overview
[Mobile] Viewing Characters by Scene
[Mobile] Sets Overview
[Mobile] Viewing Sets by Scene
Changes & Looks
[Mobile] Adding and Removing Changes
[Mobile] Building A Change
[Mobile] Printing Bag Tags
[Mobile] Adding and Removing Looks
[Mobile] Building Looks for HMU
The New and Improved Changes and Looks for Mobile
Wrap
Actors
Photos
Budgeting and Money Tracking
Budgeting
Budget Overview
Creating an Amort Episode
Budgeting for Costume
Budgeting for Miscellaneous
Budgeting for Props
Budgeting for Set Dec
Budget and Money Tracking Best Practices
Budget Reports
Money Tracking
FAQs
Troubleshooting Guides
Login Issues on the Mobile App
Login Issues on the Website
Cannot Edit Production
Scenes/Characters Missing After Breakdown
Unable to Sync
Missing Photos
Miscellaneous Groups Don’t Match
Bag Tag Printing Skips Labels
Reports Skipping Pages
Editing the Name of a Script Revision
Web Browser is Slow
Product Updates
AssetHub
Getting Started
Managing Assets
Creating Assets
Creating Assets by Exporting Inventory from SyncOnSet
Creating Assets Manually
Creating Assets with Asset Import
Reconciling Single Transactions as Assets
Reconciling Journal Entries
Handling Returns
Bulk Reconciling Transactions
Bulk Updating
Excluding Transactions
Splitting Transactions
Splitting/Duplicating Assets
Merging Assets
Adding Photos to an Asset
Uploading Documents to an Asset
Choosing the Correct Disposition
Creating Storage Locations and Sub Locations
Additional Features
Running Reports (Asset Pages, CSV, PDF, Asset Disposition Report)
Searching and Filtering Assets
Creating, Editing, and Deleting Characters and Sets
Moving Assets Within AssetHub
Managing Groups
Trashing Assets
Requests and Approvals
Accessing AssetHub on a Mobile Device
Using Barcodes with Assets
AssetHub Best Practices for COVID Compliance
Features and Series
Accounting
Accounting Onboarding
Locking Currencies
Exporting Asset Reports from SmartAccounting
Exporting Asset Reports from Global Vista
Exporting Asset Reports from PSL
Uploading Ledgers
Matching Columns
Handling POs
Production Coordinator
Crew
Adding Project Users and Managing Permissions
User Permission Levels
Studios and Divisions
Creating Division Assets
Managing Events
Adding Studio Users and Managing Permissions
Customizing Fields Within Departments
Troubleshooting Guides
Webinars
All SyncOnSet Webinars
Introduction to SyncOnSet Continuity Web: Script Breakdown, Revisions, Linking and Deleting Characters
SyncOnSet Continuity Web for Costume
SyncOnSet Budgeting for Costume
Advanced SyncOnSet: Best Practices & Pro Tips
SyncOnSet for Production Coordinators
SyncOnSet Continuity for Episodic Teams: Block Shooting & Cross-boarding, Characters, Actors, and Inventory
SyncOnSet 5.0 Mobile App: Navigation, Uploading and Tagging Photos
SyncOnSet Continuity Hair & Makeup
SyncOnSet Continuity for Set Dec: Using the Mobile App
Budgeting & Money Tracking for Costumes
Budgeting & Money Tracking for Set Dec
SyncOnSet for Episodics: Season Data Transfer
SyncOnSet for Props: Introduction to Continuity & Budgeting (Web)
Transitioning to SyncOnSet 5.0 Mobile
SyncOnSet for Costumes: Adding Inventory, Changes, and Photos in Continuity Web
SyncOnSet for Students: Intro to Continuity Web
SyncOnSet Continuity Web: Production-Wide Account Basics
All AssetHub Webinars
Introduction to AssetHub 4.0: Demo
AssetHub: Managing Permissions & Adding Team Members
AssetHub: Managing Journal Entries, Returns, Merging, and Bulk Updating
Exporting Inventory from SyncOnSet to AssetHub
Webinars for Costume
Webinars for Hair and Makeup
Webinars for Props
Webinars for Set Dec
[Webinar] Logging In With Your EP Account
Table of Contents
- What is Multi-Factor Authentication?
- Why am I required to use Multi-Factor Authentication?
- Setting up Multi-Factor Authentication (MFA)
- All Categories
- Continuity Web
- Getting Started
- Multi-Factor Authentication (MFA)
Multi-Factor Authentication (MFA)

- What is Multi-Factor Authentication?
- Why am I required to use Multi-Factor Authentication?
- Setting up Multi-Factor Authentication (MFA)
This guide covers frequently asked questions around MFA including how to set it up, use it, and troubleshooting common problems.
What is Multi-Factor Authentication?
Multi-Factor Authentication (MFA) is an extra layer of security designed to ensure that you are the only person who can access your account, even if someone knows your password.
With MFA, users are prompted to enter a six-digit code after entering their password. This six-digit code is available via an authentication app that is set up on the user’s personal device(s), or you can choose to have your code sent via text (SMS).
Why am I required to use Multi-Factor Authentication?
As part of Entertainment Partners’ ongoing commitment to ensuring the highest levels of security for our clients and the industry, EP has implemented Multi-factor Authentication (MFA) across our solutions. For more information, navigate to https://www.ep.com/mfa/general/.
Setting up Multi-Factor Authentication (MFA)
Each time you log in to the web app or mobile app, you will be prompted to enter a 6-digit code following your password. If you have not previously used MFA with any EP Products, you will prompted to set up MFA upon your next log in. You can choose to set up your MFA to have this code generated by an authenticator app, a desktop app, Yubikey or SMS (Short Message Service).
Using an Authenticator App
If you choose to use an authenticator app, we recommend using Google Authenticator or Authy with Multi-Device and Backups enabled.
- Go to the App Store or Google Play to search for and install an authenticator app on your mobile device. We recommend Google Authenticator or Authy.
- Set up an account for the authenticator app with your email address.
- Log in to synconset.com or assets.synconset.com with your email and password. You will be prompted to set up MFA by clicking Start on the Welcome to Entertainment Partners page.
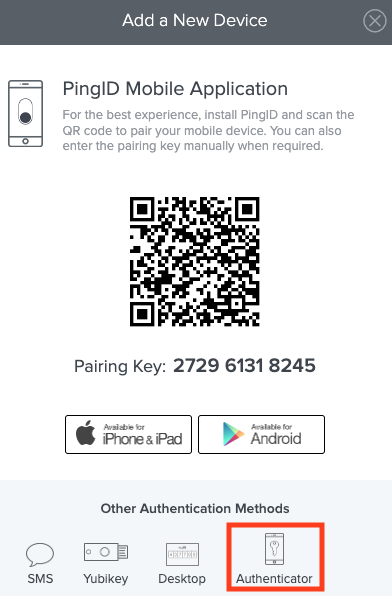
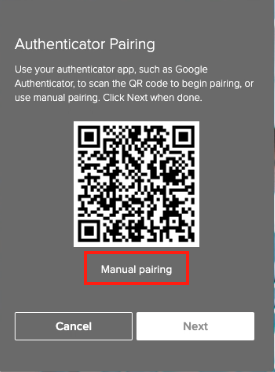
- Click Authenticator at the bottom of the Add a New Device form to generate a QR code.
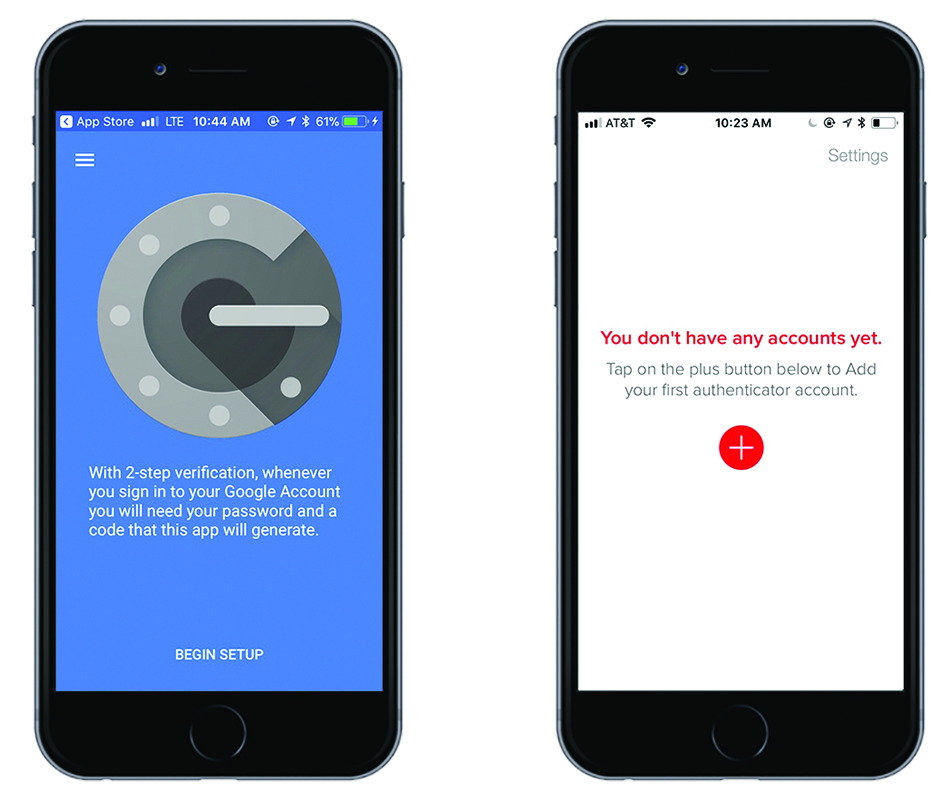
- On the authenticator app, tap BEGIN SETUP or (+) (Google Authenticator) or the red (+) Add Account (Authy). The authenticator app will prompt you to scan the QR code.
- Tap Scan a QR code (Google Authenticator) or Scan QR Code (Authy).
- If you are on a mobile device, you cannot scan the QR code but you can tap Manual Pairing under the QR code to set up the token. Then tap Enter a setup key (Google Authenticator) or Enter key manually (Authy).
- After you scan the QR code (or manually enter the key), the app will generate a 6-digit time sensitive code for you to enter.
- Return to the SyncOnSet login page, enter the 6-digit code from the authenticator app, and click Verify.
Authy Multi-Device and Backup Password
Authy Backups Password is a feature provided by Authy that allows users to encrypt and sync their tokens across Authy’s servers. This means your tokens can be imported to multiple devices.
In order to set up Backups, you must first create a Backups Password to encrypt your data. Due to the encrypted nature of the data, your password is never stored by Authy and therefore cannot be retrieved if you lose it or forget it. Backups is required to effectively use multi-device.
Authy Multi-Device is a feature that allows Authy users to log in to their account on multiple devices simultaneously. For security, when multi-device is disabled, Authy accounts and their tokens are device specific. This means if you get a new device or deletes and reinstalls the Authy app without multi-device enabled, your account is locked and inaccessible without Authy’s support.
Using SMS (Short Message Service)
- Log in to synconset.com or assets.synconset.com with your email and password. You will be prompted to set up MFA by clicking Start on the Welcome to Entertainment Partners page.
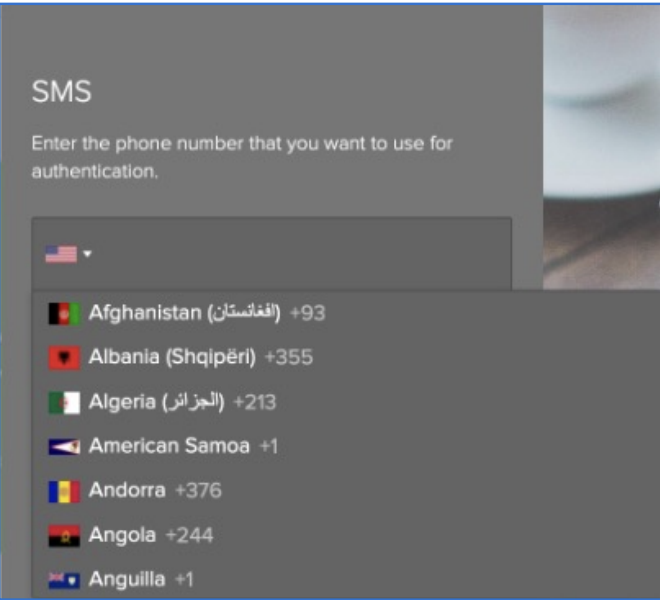
- Click SMS at the bottom of the Add a New Device form to have a code sent to your phone as the default option.

- On the SMS screen click the dropdown to select your country code.
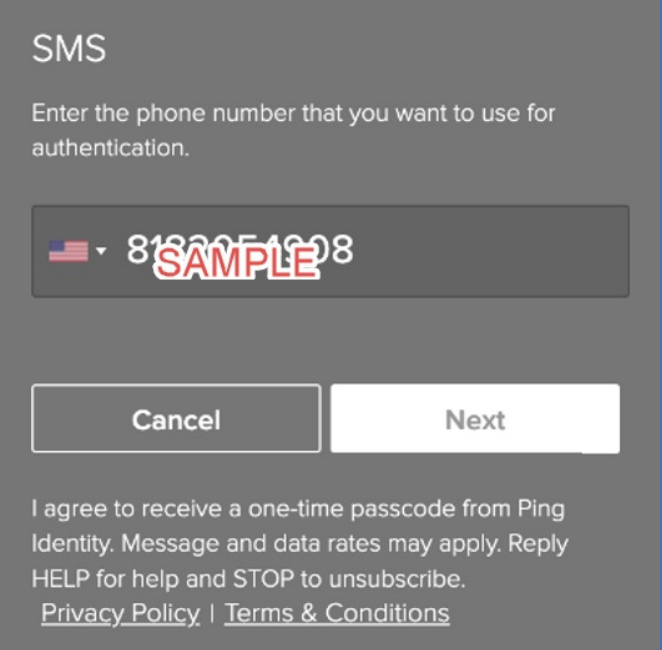
- Enter your phone number. Then, click Next.
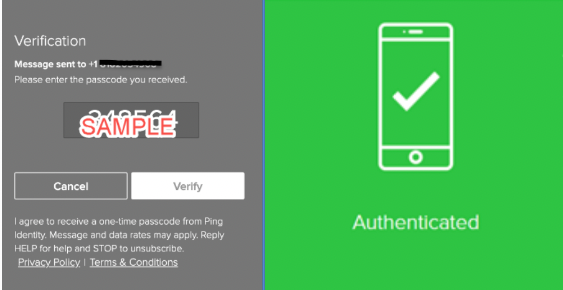
- The Verification screen opens. A confirmation passcode is texted to your mobile device. Enter the passcode and then click Verify.
- The Authenticated screen means success, and you are signed in to your EP product. You will also receive email confirmation.
Using PingID Mobile App
- Log in to synconset.com or assets.synconset.com with your email and password. You will be prompted to set up MFA by clicking Start on the Welcome to Entertainment Partners page.
- PingID mobile app is the default option on the Add a New Device form.
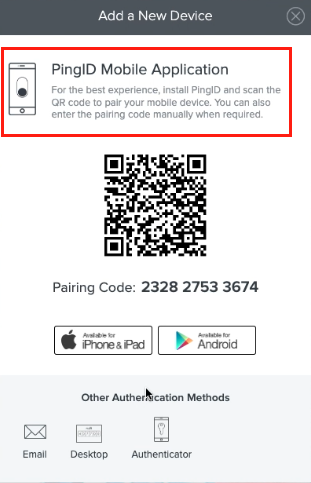
- Using your mobile device, open your camera app and scan the QR code, which prompts you to download or open the PingID mobile app. The PingID app opens and verifies your device. Complete your profile by adding an account nickname. Tap Done when complete.

- The Authenticated screen means success. Your six-digit token displays on your PingID mobile app, or you can choose to have it authenticate biometrically. For future logins, enter the code and click Sign On.
Using PingID Desktop App
- Log in to synconset.com or assets.synconset.com with your email and password. You will be prompted to set up MFA by clicking Start on the Welcome to Entertainment Partners page.
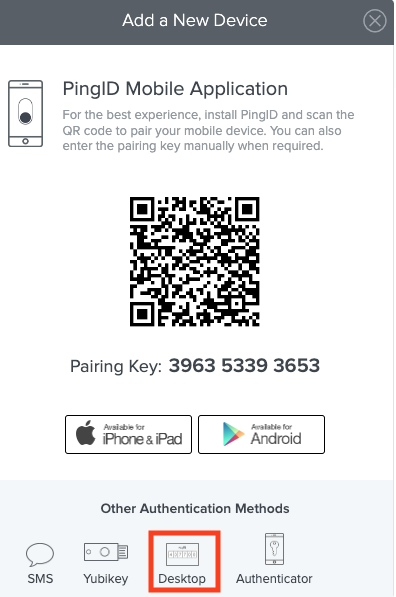
- Click Desktop at the bottom of the Add a New Device form.
- Depending on your computer, click Download for Windows or Download for Mac OS X to download the PingID desktop app.
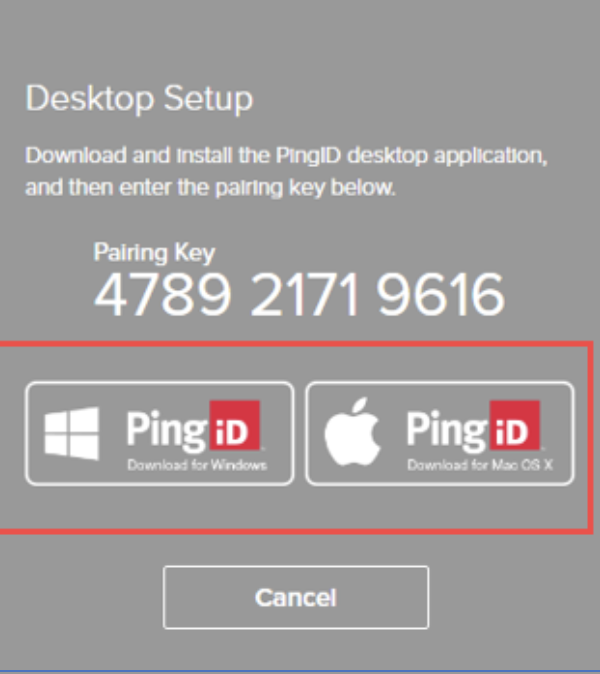
- Open the PingID desktop app. Enter the pairing key from the Desktop Setup screen and click Pair.
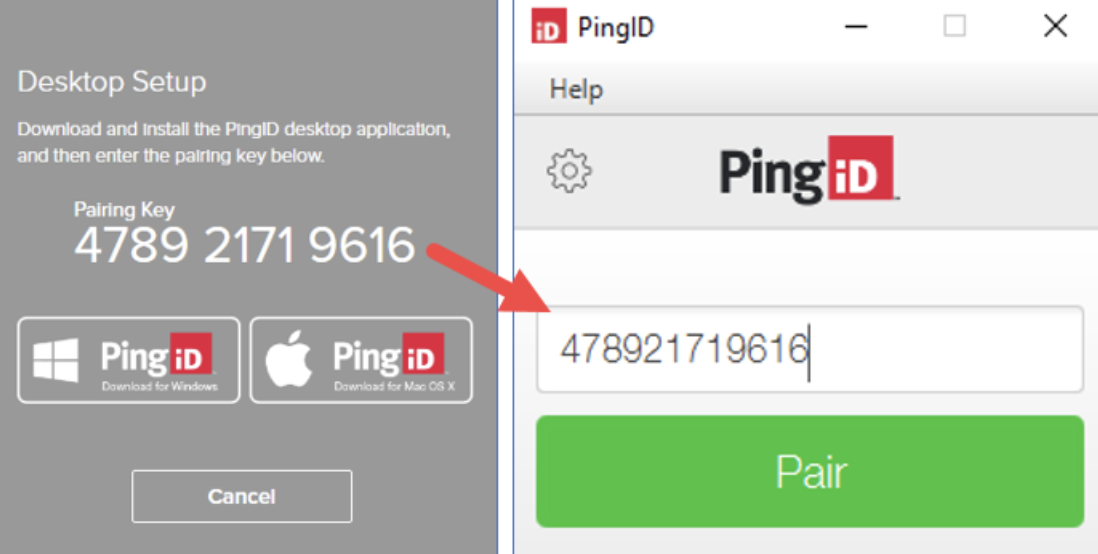
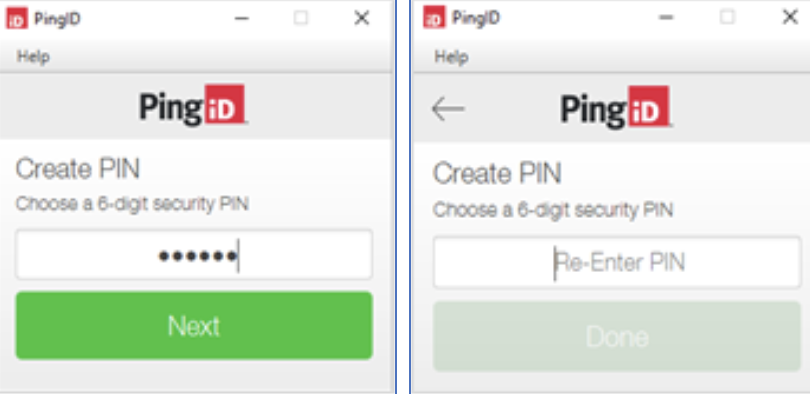
- Set up a security PIN for PingID. This is a six-digit number of your choice that you use to unlock your PingID desktop app. Enter your PIN and click Next. Re-enter your PIN and click Done.
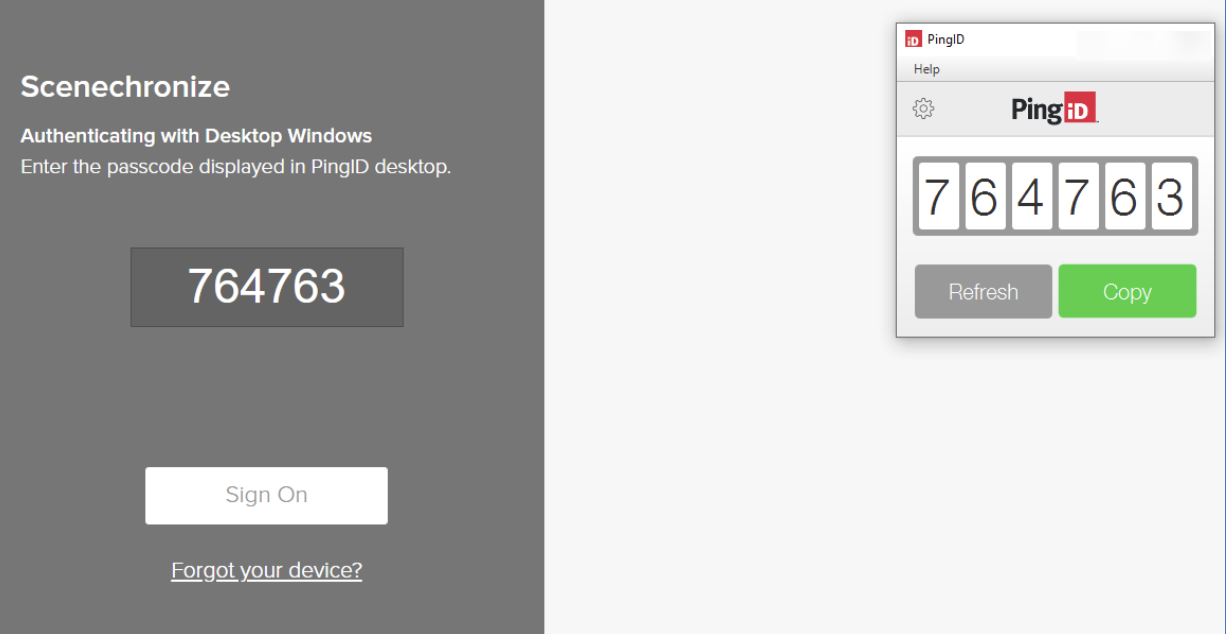
- Your six-digit token displays on your PingID desktop app. For future logins, enter the code and click Sign On.
Resetting Multi-Factor Authentication (MFA)
If you need to change your primary MFA method or want to add a secondary method you can reset your MFA without contacting Support.
From PingID Settings
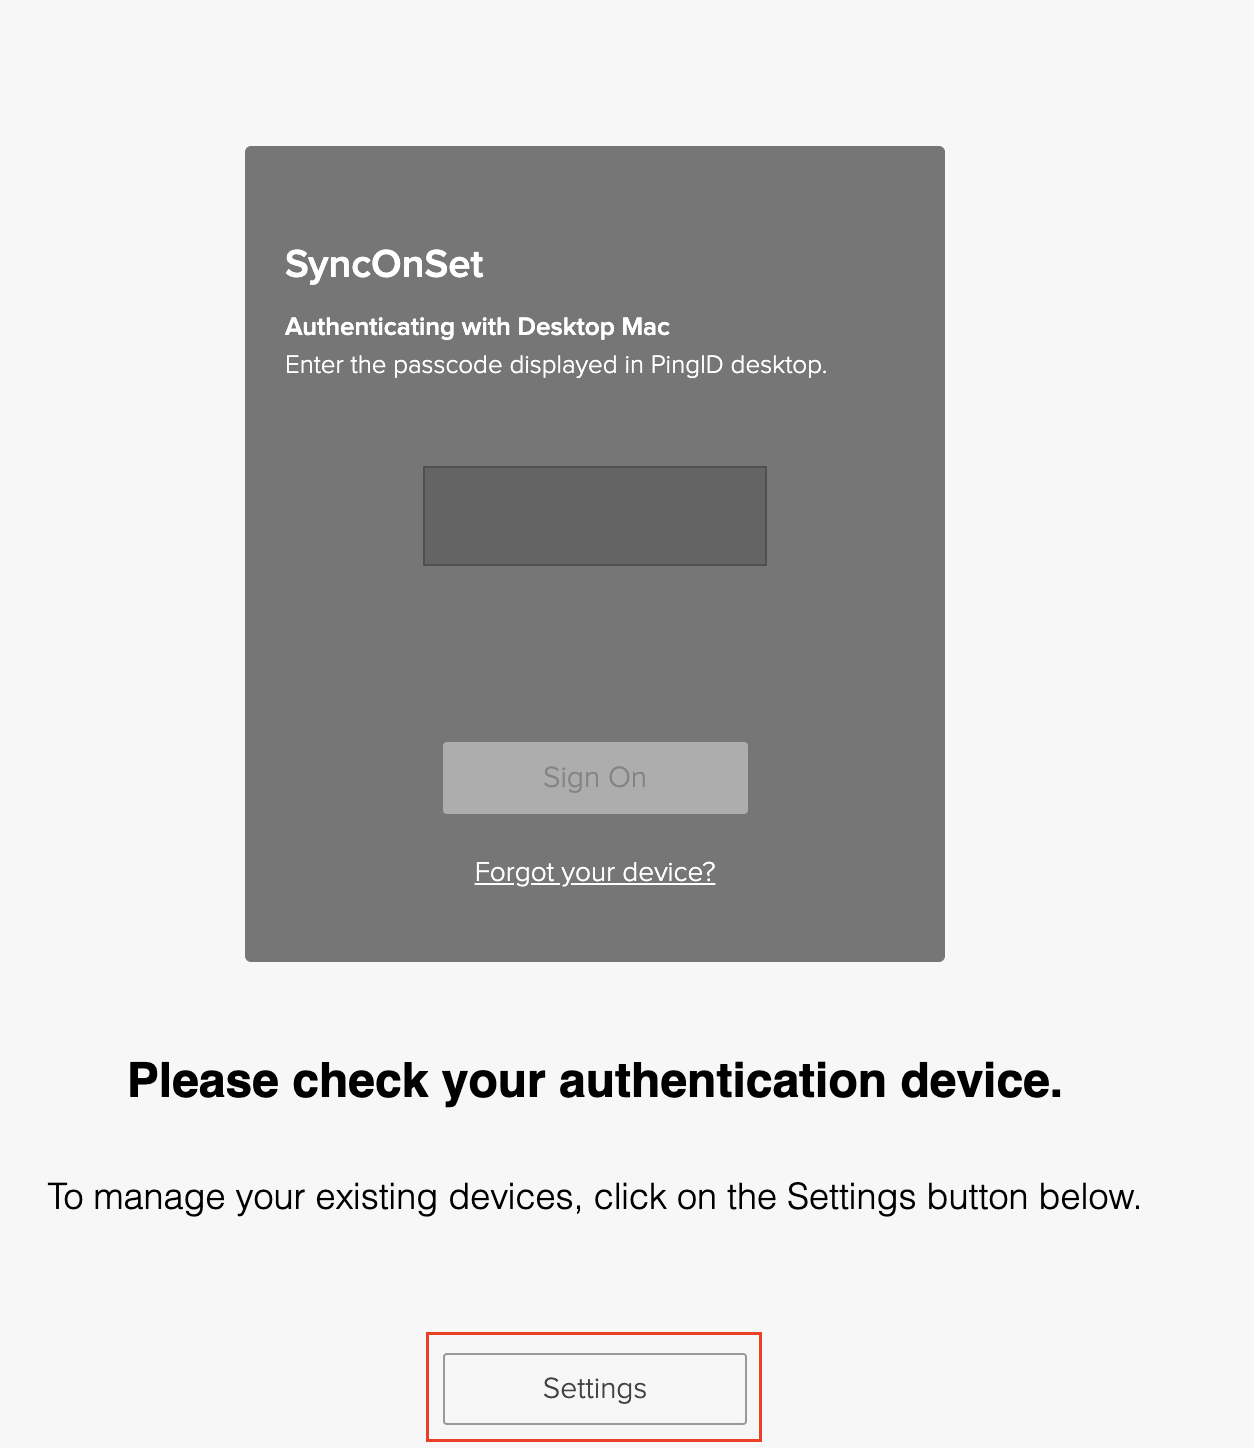
- Log in to synconset.com or assets.synconset.com with your email and password. You will be prompted to enter an MFA token. Instead of entering an MFA token, click Settings at the bottom of the page.
- Click +Add.
- Click Continue to authenticate.
- If you have access to your current authentication method, enter the token and click Sign On.
- Click +Add and select your chosen authentication method as outlined above.