Continuity Web
Getting Started
Episodics
Adding Episodes
Viewing Multiple Episodes
Episodics: Traditional vs. Like a Feature
Season Data Transfer
Logging In With Your EP Account
Register for SyncOnSet
Creating a Production and Initial Script Breakdown
Revising a Script
Accessing My Productions
Production Homepage Overview
Production Security
Managing Users and Permissions
Working on a Shared Breakdown
Multi-Department Views
Free Trials
Lite Plan for Features
Student Productions
Universal Search
Adding Notes
Managing Approvals
Calendar View
SyncOnSet Best Practices for COVID Compliance
The New and Improved SyncOnSet
Scenes
Scene Index Overview
Customizing the Scene Index
Managing Scenes
Managing Script Locations
Adding and Updating Shoot Dates
Scene View Overview
Adding Characters to a Scene
Inventory
Inventory Overview
Managing Inventory
Customizing the Inventory Index
Character Closets
Adding and Deleting Inventory
Inventory Reports
The New and Improved Inventory
Tracking Assets in Continuity
Characters and Sets
Character Index Overview
Character View Overview
Principal Characters with Multiple Numbers
Adding and Removing Background
Adding and Removing Principal Characters
Linking and Merging Characters
Deleting a Character
Set Index Overview
Set View Overview
Adding and Removing Sets
Changes and Looks
The New and Improved Changes and Looks
Changes Overview
Building a Change
Adding and Removing Changes
Editing and Inserting Changes
Bag Tags/Change Labels
Looks Overview
Building Looks for HMU
Adding and Removing Looks
Actors
Actor Index Overview
Creating Actors and Assigning Actors to Characters
Actor View Overview
The New and Improved Actors
Gallery
Gallery Overview
Uploading and Tagging Photos
Sorting and Filtering the Gallery
Printing & Sharing Photos
Wrap, Continuity Book, and Reports
Continuity Mobile
Getting Started
[Mobile] Logging In With Your EP Account
What's New in 5.5.0?
[Mobile] Home Page
[Mobile] App Settings
[Mobile] Multi-Department View
[Mobile] Syncing
[Mobile] Universal Search
[Mobile] Switching Productions and Multi-Episode View
[Mobile] Adding Notes
[Mobile] Permissions
The New and Improved Mobile App
Mobile App Overview
[Mobile] Upgrading to SyncOnSet 5.0
Scenes
Inventory
[Mobile] Inventory Overview
[Mobile] Character Closets
[Mobile] The New and Improved Inventory
[Mobile] Managing Inventory
[Mobile] Adding and Removing Inventory
Characters + Sets
[Mobile] Character Index Overview
[Mobile] Character View Overview
[Mobile] Viewing Characters by Scene
[Mobile] Sets Overview
[Mobile] Viewing Sets by Scene
Changes & Looks
[Mobile] Adding and Removing Changes
[Mobile] Building A Change
[Mobile] Printing Bag Tags
[Mobile] Adding and Removing Looks
[Mobile] Building Looks for HMU
The New and Improved Changes and Looks for Mobile
Wrap
Actors
Photos
Budgeting and Money Tracking
Budgeting
Budget Overview
Creating an Amort Episode
Budgeting for Costume
Budgeting for Miscellaneous
Budgeting for Props
Budgeting for Set Dec
Budget and Money Tracking Best Practices
Budget Reports
Money Tracking
FAQs
Troubleshooting Guides
Cannot Edit Production
Scenes/Characters Missing After Breakdown
Unable to Sync
Missing Photos
Miscellaneous Groups Don’t Match
Bag Tag Printing Skips Labels
Reports Skipping Pages
Editing the Name of a Script Revision
Web Browser is Slow
Product Updates
AssetHub
Getting Started
Managing Assets
Creating Assets
Creating Assets by Exporting Inventory from SyncOnSet
Creating Assets Manually
Creating Assets with Asset Import
Reconciling Single Transactions as Assets
Reconciling Journal Entries
Handling Returns
Bulk Reconciling Transactions
Bulk Updating
Excluding Transactions
Splitting Transactions
Splitting/Duplicating Assets
Merging Assets
Adding Photos to an Asset
Uploading Documents to an Asset
Choosing the Correct Disposition
Creating Storage Locations and Sub Locations
Additional Features
Running Reports (Asset Pages, CSV, PDF, Asset Disposition Report)
Searching and Filtering Assets
Creating, Editing, and Deleting Characters and Sets
Moving Assets Within AssetHub
Managing Groups
Trashing Assets
Requests and Approvals
Accessing AssetHub on a Mobile Device
Using Barcodes with Assets
AssetHub Best Practices for COVID Compliance
Features and Series
Accounting
Accounting Onboarding
Locking Currencies
Exporting Asset Reports from SmartAccounting
Exporting Asset Reports from Global Vista
Exporting Asset Reports from PSL
Uploading Ledgers
Matching Columns
Handling POs
Production Coordinator
Crew
Adding Project Users and Managing Permissions
User Permission Levels
Studios and Divisions
Creating Division Assets
Managing Events
Adding Studio Users and Managing Permissions
Customizing Fields Within Departments
Troubleshooting Guides
Webinars
All SyncOnSet Webinars
Introduction to SyncOnSet Continuity Web: Script Breakdown, Revisions, Linking and Deleting Characters
SyncOnSet Continuity Web for Costume
SyncOnSet Budgeting for Costume
Advanced SyncOnSet: Best Practices & Pro Tips
SyncOnSet for Production Coordinators
SyncOnSet Continuity for Episodic Teams: Block Shooting & Cross-boarding, Characters, Actors, and Inventory
SyncOnSet 5.0 Mobile App: Navigation, Uploading and Tagging Photos
SyncOnSet Continuity Hair & Makeup
SyncOnSet Continuity for Set Dec: Using the Mobile App
Budgeting & Money Tracking for Costumes
Budgeting & Money Tracking for Set Dec
SyncOnSet for Episodics: Season Data Transfer
SyncOnSet for Props: Introduction to Continuity & Budgeting (Web)
Transitioning to SyncOnSet 5.0 Mobile
SyncOnSet for Costumes: Adding Inventory, Changes, and Photos in Continuity Web
SyncOnSet for Students: Intro to Continuity Web
SyncOnSet Continuity Web: Production-Wide Account Basics
All AssetHub Webinars
Introduction to AssetHub 4.0: Demo
AssetHub: Managing Permissions & Adding Team Members
AssetHub: Managing Journal Entries, Returns, Merging, and Bulk Updating
Exporting Inventory from SyncOnSet to AssetHub
Webinars for Costume
Webinars for Hair and Makeup
Webinars for Props
Webinars for Set Dec
Table of Contents
- All Categories
- Continuity Web
- Characters and Sets
- Character View Overview
Character View Overview
 Updated
by Michelle Salatto
To access a Character View page, use the Universal Search bar to find a Character, or click the blue hyperlink of the Character name from the Scene Index, Character Index, or the Inventory Index.
The Character View displays Character details for multiple departments, so if you have access to more than one department, you can view all of the information assigned to that Character on the Character View.
Click the Next and Previous buttons to go to the next or previous Character.
Edit Character Details
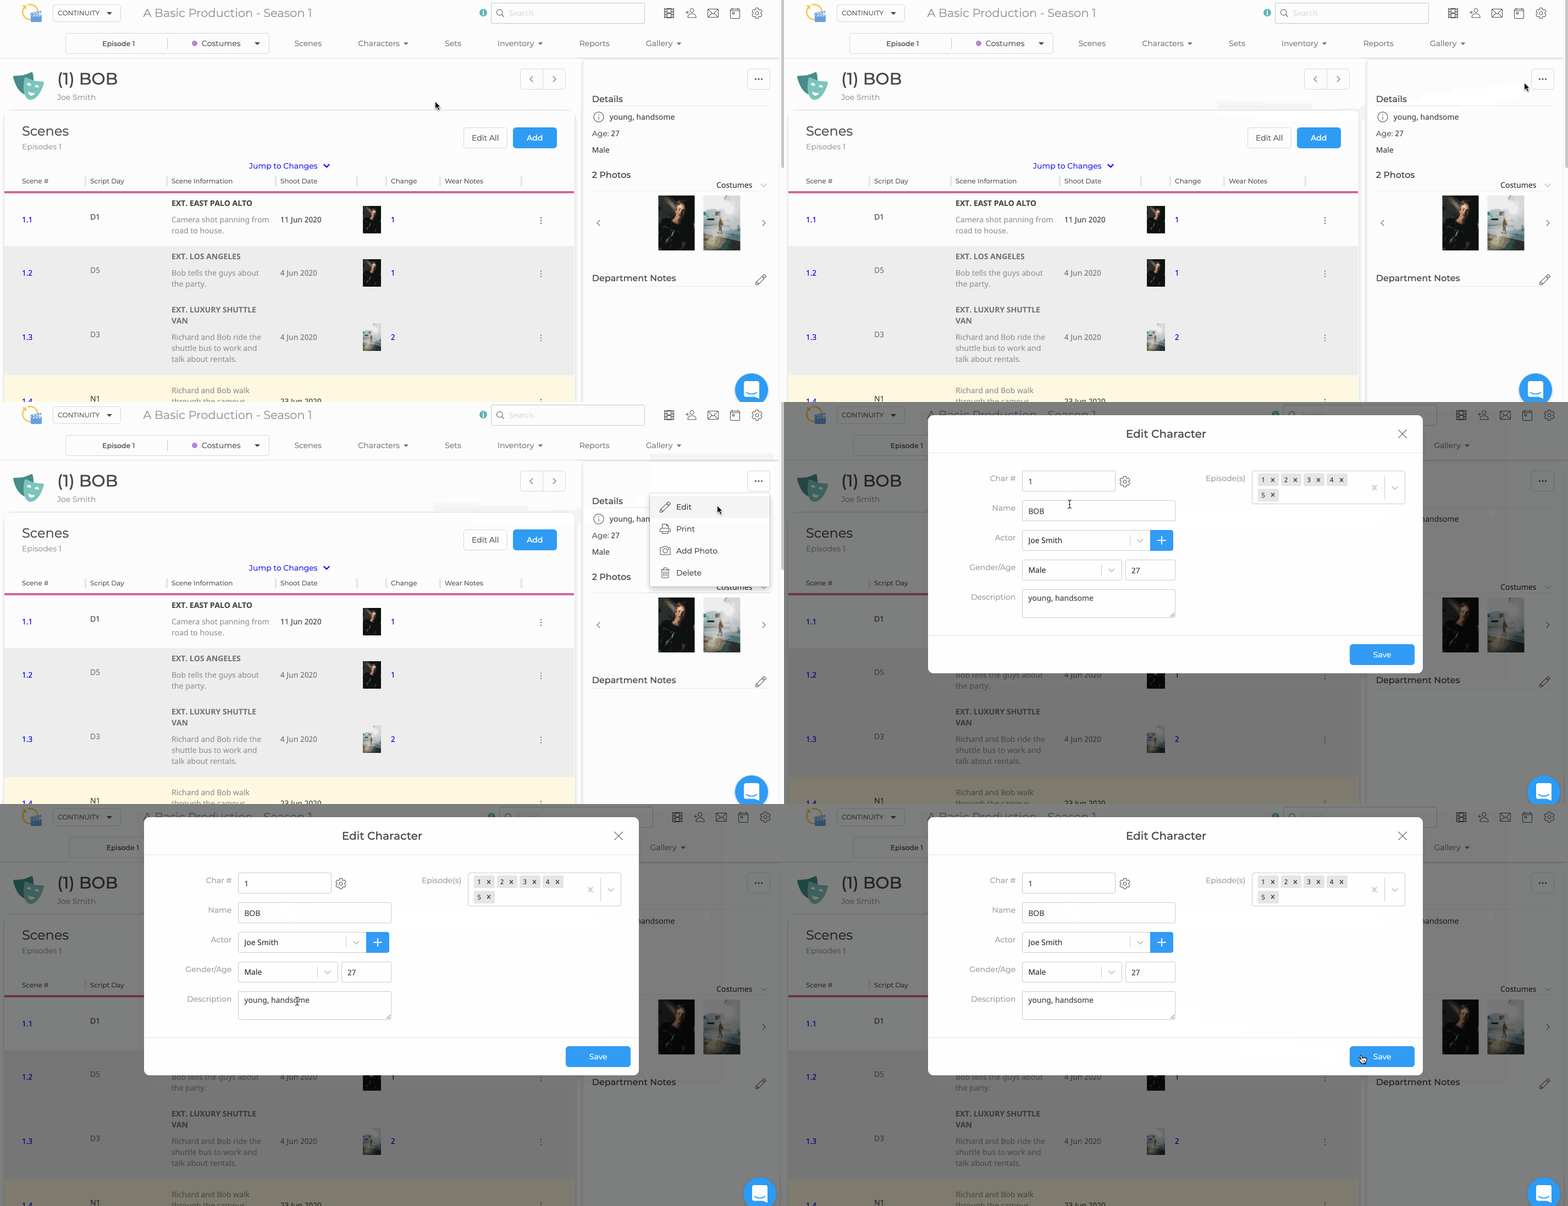
Character Details will display on the Sidebar of this page. You can update the Character Details by clicking on the Sidebar Ellipsis and selecting Edit. From here you can update the Character Type, Character Number(s), Name, Actor, Gender, Age, Description, or Add/Remove them from Episodes.

For episodics, there is only one version of the Character for the full season. See Principal Characters with Multiple Numbers to learn how to add a different character number for an episode.
Photos
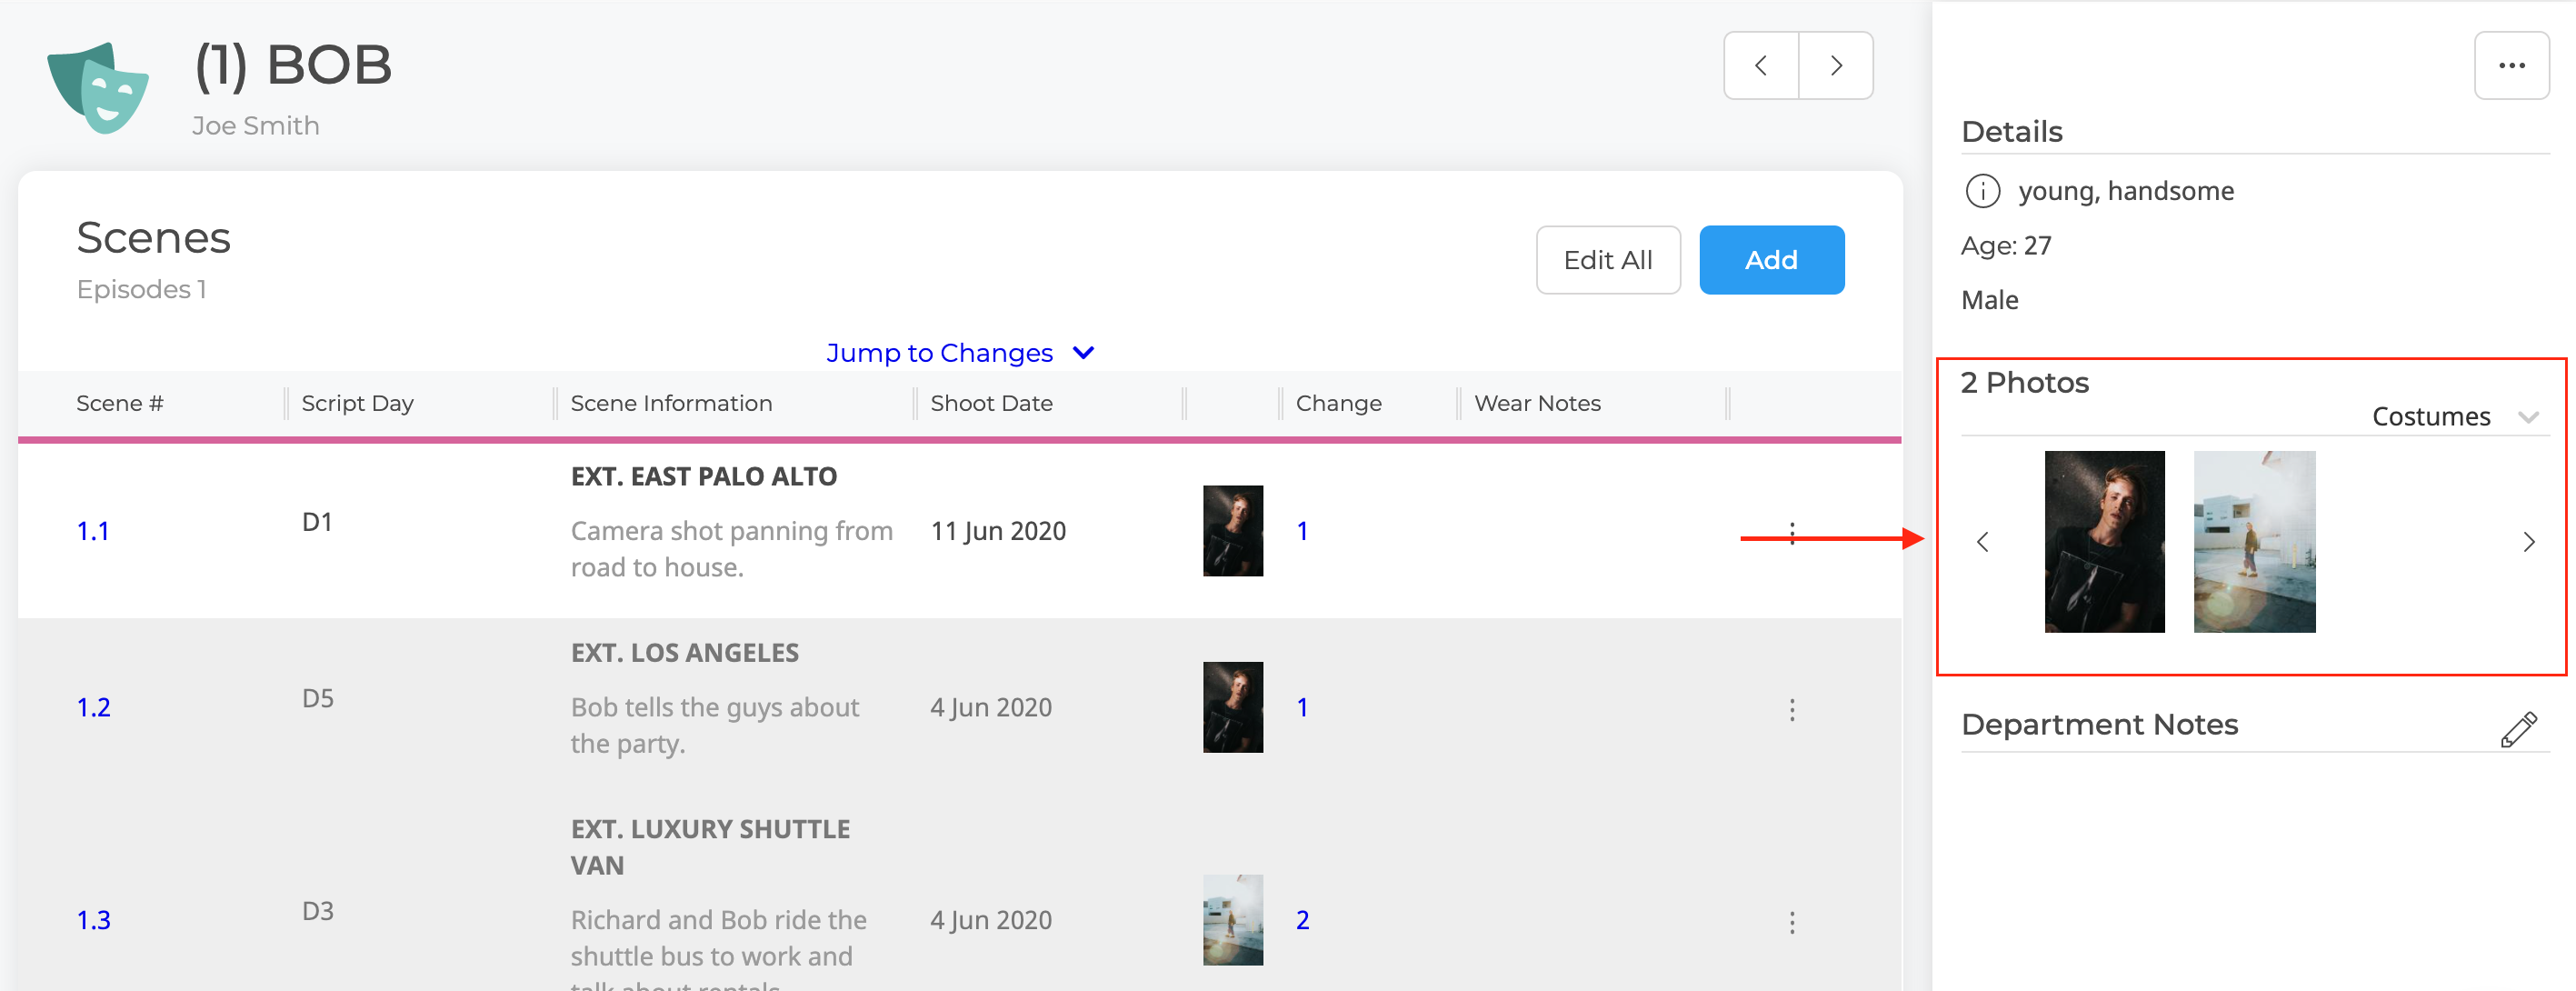
Each Character has a Photo carousel for all the images tagged to that Character. Photos must be tagged to the Character and not be tagged as Research to display in this carousel.

The photos that are synced up from your team’s mobile devices will display here if tagged correctly. To add new photos, click Add Photo from the Sidebar Ellipsis menu.

- Related Article: Uploading and Tagging Photos
Assign Characters to Scenes
You can add a Character to Scenes in the Scene card on the Character View page. Click Add on the Scene card to select which existing Scenes you would like to add the Character to.

For episodics, make sure the Character is added to the correct episode before adding them to Scenes from that episode.
- Related Articles: Adding Characters to a Scene, Creating Actors and Assigning Actors to Characters
The actions below are department-specific. You will need access to the specific departments and have them selected in the department selector in order to perform them.
Changes
You can view and add the Changes for this Character either by Scene in the Scene card or in the Changes card below the Scene card.
To edit Changes here, click on the ellipsis inline with the Scene or Change you’d like to edit. For more information about adding Changes and adjust Change Numbers read Editing and Inserting Changes.

- Related Articles: The New and Improved Changes and Looks, Changes Overview, Building a Change, Adding and Removing Changes, Uploading and Tagging Photos, Character Closets
Looks
Hair and Makeup users will have access to a Character’s Looks on the Character View page.
View and add the Looks for a Character either by Scene in the Scene table or in the Looks table below the Scene table.
To add or edit Looks here, click on the ellipsis inline with the Scene or Look you’d like to edit.


- Related Articles: The New and Improved Changes and Looks, Adding and Removing Looks, Uploading and Tagging Photos
Props
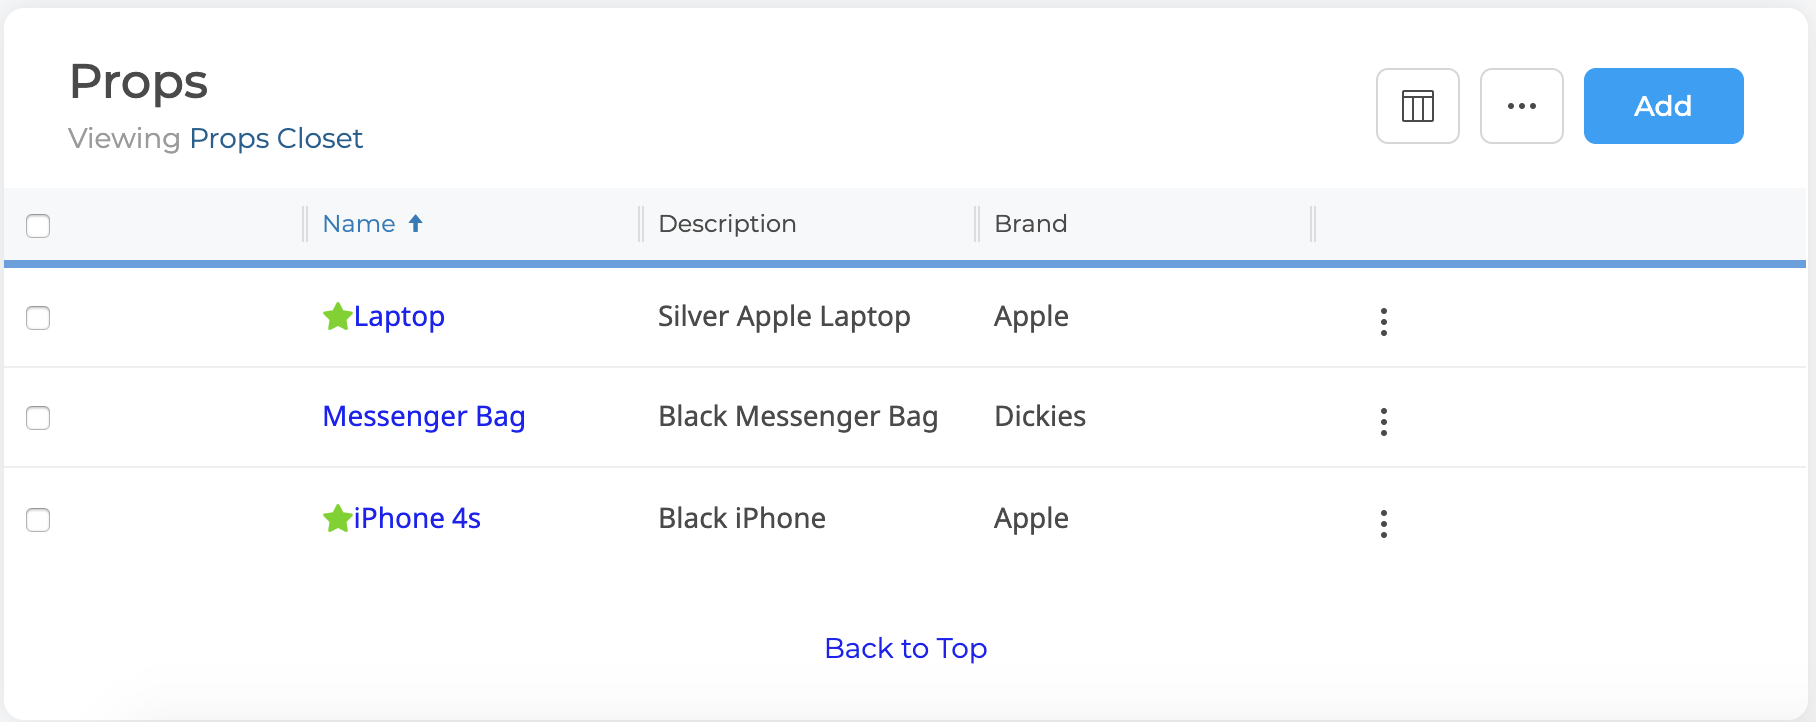
Props have their own table below the Scenes. Personal Props for a Character are noted with a green star.
Click Add on the Props table to add new Character Props or to add existing Props to the Character Closet.
Click the Horizontal Ellipsis at the top of the table to Display Personal Props, Display Props Closet, or Add selected Props to multiple (or all) Scenes at once.
To edit Props, click on the Ellipsis inline with the Scene or Prop you’d like to edit.

- Related Articles: Character Closets, Uploading and Tagging Photos
