Continuity Web
Getting Started
Episodics
Adding Episodes
Viewing Multiple Episodes
Episodics: Traditional vs. Like a Feature
Season Data Transfer
Logging In With Your EP Account
Register for SyncOnSet
Creating a Production and Initial Script Breakdown
Revising a Script
Accessing My Productions
Production Homepage Overview
Production Security
Managing Users and Permissions
Working on a Shared Breakdown
Multi-Department Views
Free Trials
Lite Plan for Features
Student Productions
Universal Search
Adding Notes
Managing Approvals
Calendar View
SyncOnSet Best Practices for COVID Compliance
The New and Improved SyncOnSet
Scenes
Scene Index Overview
Customizing the Scene Index
Managing Scenes
Managing Script Locations
Adding and Updating Shoot Dates
Scene View Overview
Adding Characters to a Scene
Inventory
Inventory Overview
Managing Inventory
Customizing the Inventory Index
Character Closets
Adding and Deleting Inventory
Inventory Reports
The New and Improved Inventory
Tracking Assets in Continuity
Characters and Sets
Character Index Overview
Character View Overview
Principal Characters with Multiple Numbers
Adding and Removing Background
Adding and Removing Principal Characters
Linking and Merging Characters
Deleting a Character
Set Index Overview
Set View Overview
Adding and Removing Sets
Changes and Looks
The New and Improved Changes and Looks
Changes Overview
Building a Change
Adding and Removing Changes
Editing and Inserting Changes
Bag Tags/Change Labels
Looks Overview
Building Looks for HMU
Adding and Removing Looks
Actors
Actor Index Overview
Creating Actors and Assigning Actors to Characters
Actor View Overview
The New and Improved Actors
Gallery
Gallery Overview
Uploading and Tagging Photos
Sorting and Filtering the Gallery
Printing & Sharing Photos
Wrap, Continuity Book, and Reports
Continuity Mobile
Getting Started
[Mobile] Logging In With Your EP Account
What's New in 5.5.0?
[Mobile] Home Page
[Mobile] App Settings
[Mobile] Multi-Department View
[Mobile] Syncing
[Mobile] Universal Search
[Mobile] Switching Productions and Multi-Episode View
[Mobile] Adding Notes
[Mobile] Permissions
The New and Improved Mobile App
Mobile App Overview
[Mobile] Upgrading to SyncOnSet 5.0
Scenes
Inventory
[Mobile] Inventory Overview
[Mobile] Character Closets
[Mobile] The New and Improved Inventory
[Mobile] Managing Inventory
[Mobile] Adding and Removing Inventory
Characters + Sets
[Mobile] Character Index Overview
[Mobile] Character View Overview
[Mobile] Viewing Characters by Scene
[Mobile] Sets Overview
[Mobile] Viewing Sets by Scene
Changes & Looks
[Mobile] Adding and Removing Changes
[Mobile] Building A Change
[Mobile] Printing Bag Tags
[Mobile] Adding and Removing Looks
[Mobile] Building Looks for HMU
The New and Improved Changes and Looks for Mobile
Wrap
Actors
Photos
Budgeting and Money Tracking
Budgeting
Budget Overview
Creating an Amort Episode
Budgeting for Costume
Budgeting for Miscellaneous
Budgeting for Props
Budgeting for Set Dec
Budget and Money Tracking Best Practices
Budget Reports
Money Tracking
FAQs
Troubleshooting Guides
Cannot Edit Production
Scenes/Characters Missing After Breakdown
Unable to Sync
Missing Photos
Miscellaneous Groups Don’t Match
Bag Tag Printing Skips Labels
Reports Skipping Pages
Editing the Name of a Script Revision
Web Browser is Slow
Product Updates
AssetHub
Getting Started
Managing Assets
Creating Assets
Creating Assets by Exporting Inventory from SyncOnSet
Creating Assets Manually
Creating Assets with Asset Import
Reconciling Single Transactions as Assets
Reconciling Journal Entries
Handling Returns
Bulk Reconciling Transactions
Bulk Updating
Excluding Transactions
Splitting Transactions
Splitting/Duplicating Assets
Merging Assets
Adding Photos to an Asset
Uploading Documents to an Asset
Choosing the Correct Disposition
Creating Storage Locations and Sub Locations
Additional Features
Running Reports (Asset Pages, CSV, PDF, Asset Disposition Report)
Searching and Filtering Assets
Creating, Editing, and Deleting Characters and Sets
Moving Assets Within AssetHub
Managing Groups
Trashing Assets
Requests and Approvals
Accessing AssetHub on a Mobile Device
Using Barcodes with Assets
AssetHub Best Practices for COVID Compliance
Features and Series
Accounting
Accounting Onboarding
Locking Currencies
Exporting Asset Reports from SmartAccounting
Exporting Asset Reports from Global Vista
Exporting Asset Reports from PSL
Uploading Ledgers
Matching Columns
Handling POs
Production Coordinator
Crew
Adding Project Users and Managing Permissions
User Permission Levels
Studios and Divisions
Creating Division Assets
Managing Events
Adding Studio Users and Managing Permissions
Customizing Fields Within Departments
Troubleshooting Guides
Webinars
All SyncOnSet Webinars
Introduction to SyncOnSet Continuity Web: Script Breakdown, Revisions, Linking and Deleting Characters
SyncOnSet Continuity Web for Costume
SyncOnSet Budgeting for Costume
Advanced SyncOnSet: Best Practices & Pro Tips
SyncOnSet for Production Coordinators
SyncOnSet Continuity for Episodic Teams: Block Shooting & Cross-boarding, Characters, Actors, and Inventory
SyncOnSet 5.0 Mobile App: Navigation, Uploading and Tagging Photos
SyncOnSet Continuity Hair & Makeup
SyncOnSet Continuity for Set Dec: Using the Mobile App
Budgeting & Money Tracking for Costumes
Budgeting & Money Tracking for Set Dec
SyncOnSet for Episodics: Season Data Transfer
SyncOnSet for Props: Introduction to Continuity & Budgeting (Web)
Transitioning to SyncOnSet 5.0 Mobile
SyncOnSet for Costumes: Adding Inventory, Changes, and Photos in Continuity Web
SyncOnSet for Students: Intro to Continuity Web
SyncOnSet Continuity Web: Production-Wide Account Basics
All AssetHub Webinars
Introduction to AssetHub 4.0: Demo
AssetHub: Managing Permissions & Adding Team Members
AssetHub: Managing Journal Entries, Returns, Merging, and Bulk Updating
Exporting Inventory from SyncOnSet to AssetHub
Webinars for Costume
Webinars for Hair and Makeup
Webinars for Props
Webinars for Set Dec
Table of Contents
- All Categories
- AssetHub
- Managing Assets
- Creating Assets
- Bulk Updating
Bulk Updating
 Updated
by Jennifer Sneider
All users can access this feature.
Update multiple items at once by selecting Assets or Transactions and using the different Bulk Buttons on the Transaction and Asset Indexes.
Bulk Buttons on the Asset Index
- While logged in to a Series/Feature/Division, click Assets on the top navigation menu.
- Select Assets by clicking the checkboxes on the left.
- Click the Bulk Button you need (details below).

Add/Update
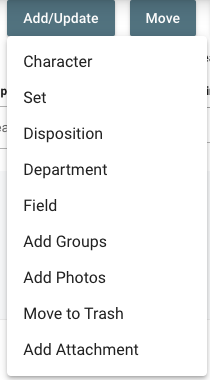
Select Add/Update to add or update the following:
- Character: Update the Character
- Set: Update the Set
- Disposition: Update the Disposition
- Department: Update the Department and/or Sub Department
- Field: Update any text field, numeric field, currency field, or custom Studio picklist field (options vary by Studio)
- By default, the new text data will be added to the beginning of the current field value
- To overwrite the existing text data, check the box next to Overwrite data instead
- Add Groups: Create new Groups or move your selected Assets into existing Groups
- Add Photos: Add photos to your selected Assets
- Move to Trash: Move selected Assets to the Trash Bin
- Add Attachment: Add attachments to selected Assets
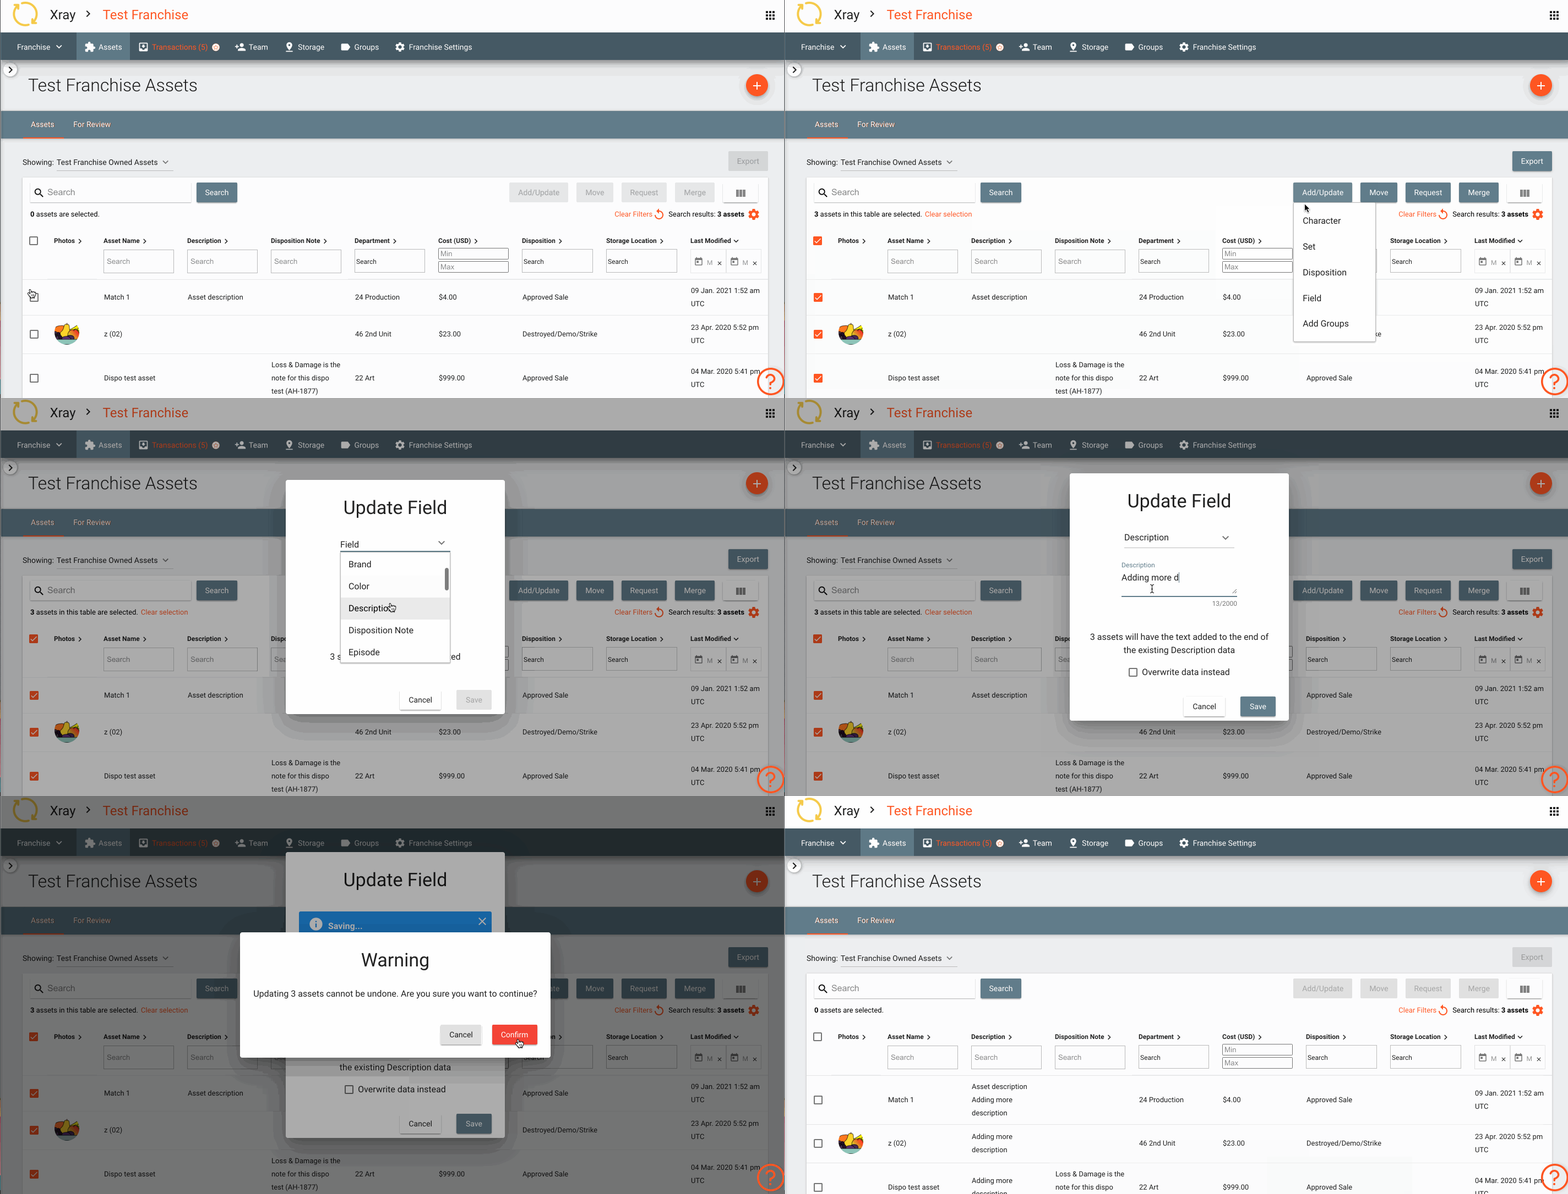
Bulk Updating Text Fields By Adding To Existing Data
- After selecting the Assets and clicking Add/Update, click Field.
- Select your desired field from the Field dropdown menu.
- Enter your text on the line beneath the chosen text field or choose your new value from the picklist field dropdown.
- Click Save to add the text to the beginning of the existing data or replace the existing picklist field.
- Click Confirm to confirm your choice and make the update.
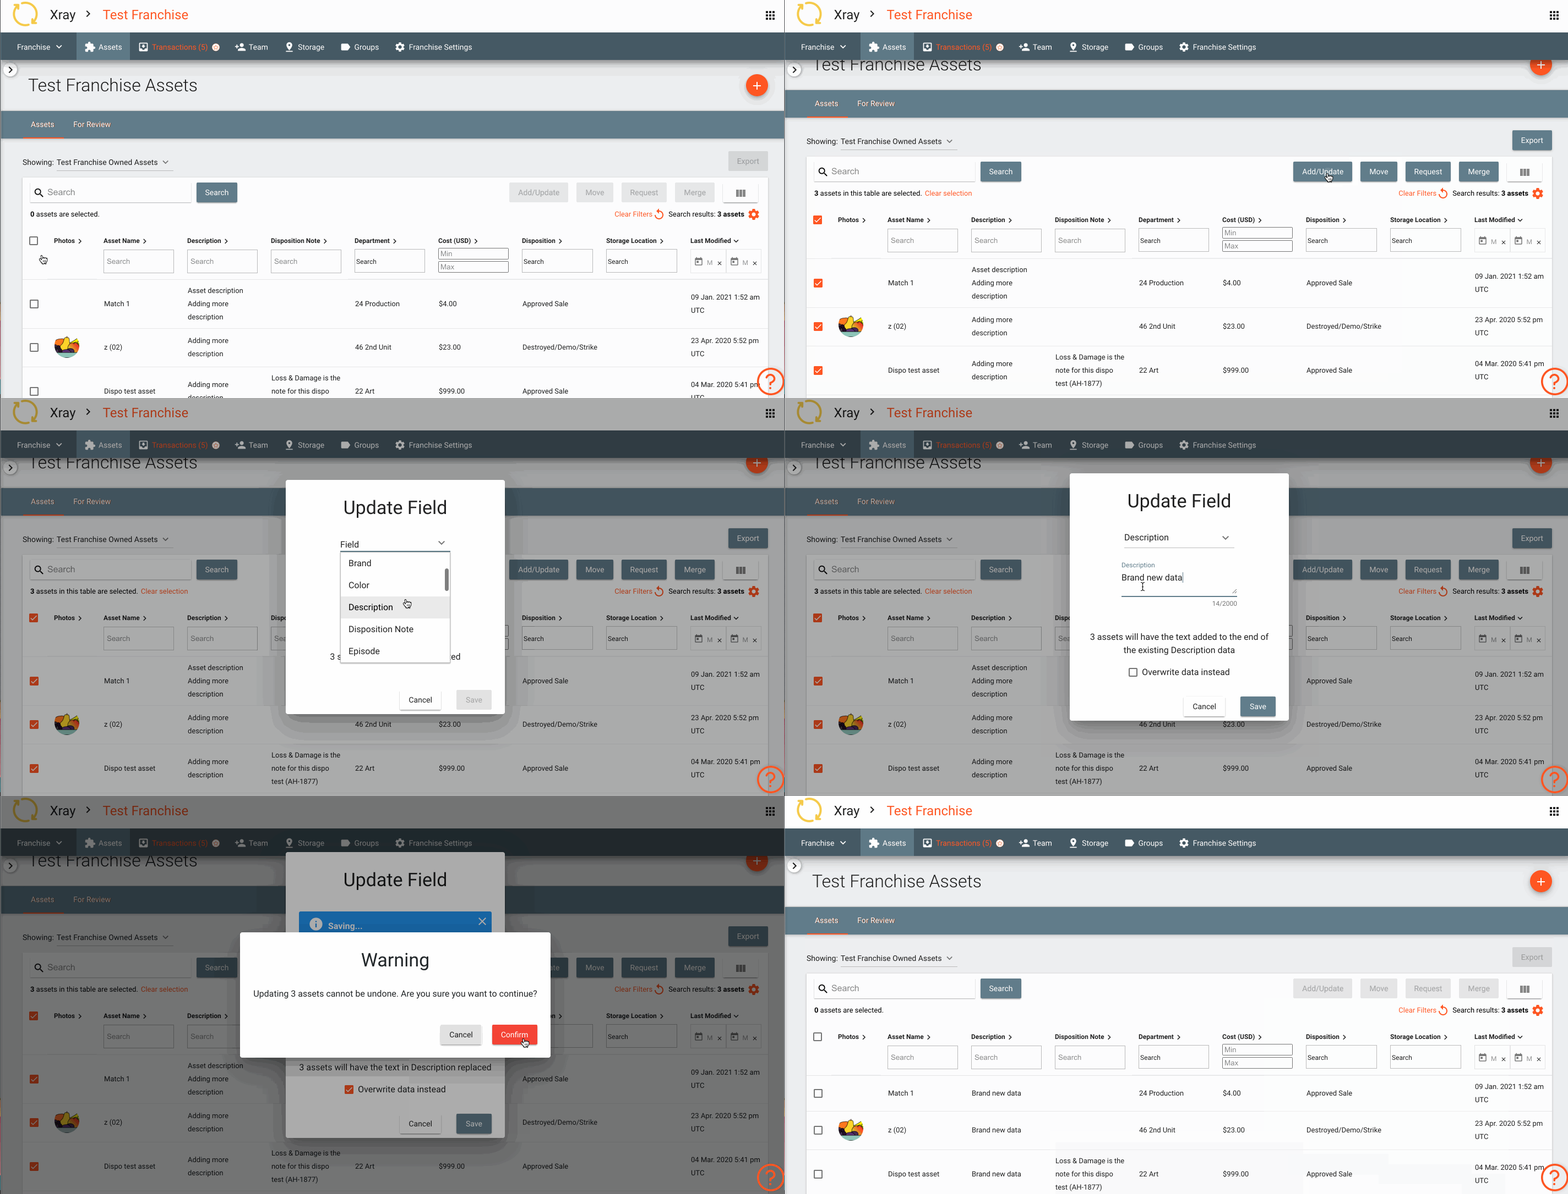
Bulk Updating Fields By Overwriting Existing Data
Numeric, currency, and picklist fields can only be overwritten and do not have a checkbox in step 4.
- After selecting the Assets and clicking Add/Update, click Field.
- Select your desired field from the Field dropdown menu.
- Enter your text on the line beneath the chosen text field.
- Check the box next to Overwrite data instead to overwrite the existing data with your new text, then click Save.
- Click Confirm to confirm your choice and make the update.
Move
Select Move to move your selected Assets to a different Feature, Series, Division, Project, or Storage Location.
Request (available at certain Studios)
Select Request to add Assets to a Request for Approval.
Merge
Select Merge to combine multiple Assets into one, picking and choosing the information from each Asset to combine.
Export
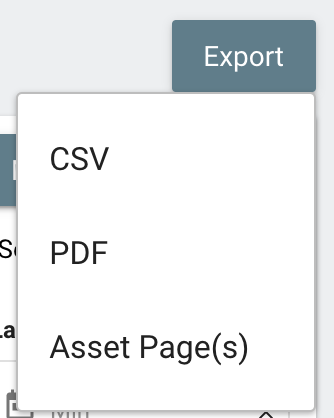
Select Export to generate a CSV file, PDF, or Asset Page(s) report of your selected Assets.
Bulk Buttons on the Transaction Index
- While logged in to your Series/Feature, click Transactions on the top navigation menu.
- Select Transactions by clicking the checkboxes on the left.
- Click the Bulk Button you need (details below).

Add/Update
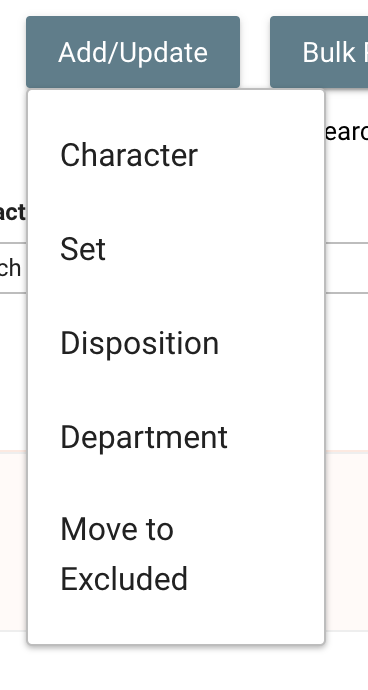
Select Add/Update to add or update the following:
- Character: Update the Character
- Set: Update the Set
- Disposition: Update the Disposition (this automatically reconciles Transactions as Assets)
- Department: Update the Department and/or Sub Department
- Move to Excluded: Moves all selected Transactions to the Excluded tab on the Transaction Index secondary navigation bar. Choose this option for Transactions that should not be reconciled into Assets.
Bulk Reconcile
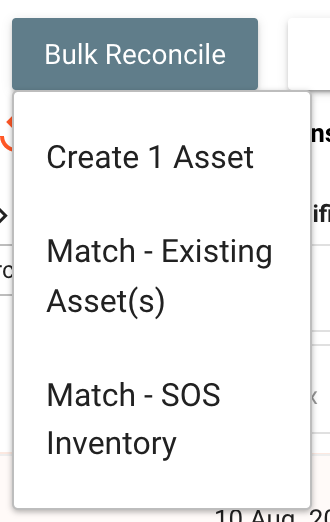
Select Bulk Reconcile to create Assets for more than one Transaction at a time:
- Create 1 Asset: Creates one Asset from all selected Transactions
- Match - Existing Asset(s): Matches all selected Transactions to all selected existing Assets
- Match - SOS Inventory: Matches all selected Transactions to all selected Assets imported from SyncOnSet
Export
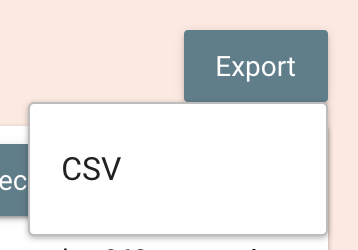
Select Export to generate a CSV file of your selected Transactions using your currently-selected columns.
